Mastering Grafana Kubernetes Monitoring with the Helm Chart: A Deep Dive
Associated Articles: Mastering Grafana Kubernetes Monitoring with the Helm Chart: A Deep Dive
Introduction
With enthusiasm, let’s navigate by the intriguing matter associated to Mastering Grafana Kubernetes Monitoring with the Helm Chart: A Deep Dive. Let’s weave attention-grabbing info and provide contemporary views to the readers.
Desk of Content material
Mastering Grafana Kubernetes Monitoring with the Helm Chart: A Deep Dive
Grafana, a strong open-source analytics and monitoring platform, is a cornerstone of efficient Kubernetes administration. Understanding its intricacies, notably when deployed through a Helm chart, is essential for any group leveraging Kubernetes at scale. This text offers a complete information to deploying and configuring the official Grafana Helm chart for Kubernetes monitoring, protecting set up, configuration, information sources, dashboards, and superior methods.
I. Why Use a Helm Chart for Grafana Deployment?
Helm is the de facto bundle supervisor for Kubernetes. Utilizing a Helm chart to deploy Grafana provides a number of important benefits over handbook deployments:
- Simplified Deployment: Helm streamlines the method of deploying advanced functions like Grafana, dealing with intricate configurations and dependencies effortlessly. A single command replaces quite a few Kubernetes YAML manifests.
- Model Management: Helm charts are versioned, permitting for reproducible deployments and simple rollback to earlier variations if mandatory. That is essential for sustaining consistency and stability in your monitoring infrastructure.
- Configuration Administration: Helm charts permit for parameterization, enabling custom-made deployments tailor-made to particular wants with out modifying the underlying chart code. That is invaluable for adapting Grafana to various environments and necessities.
- Automated Upgrades: Updating Grafana turns into an easy course of with Helm, minimizing downtime and making certain you profit from the newest options and safety patches.
- Maintainability: Helm simplifies the administration of Grafana’s lifecycle, making duties like scaling, updating, and deleting situations considerably simpler.
II. Deploying the Grafana Helm Chart
The official Grafana Helm chart is available from the Artifact Hub and might be put in utilizing the next steps:
- Add the Grafana Helm repository:
helm repo add grafana https://grafana.github.io/helm-charts
helm repo replace-
Set up the chart: The next command installs the chart with a default configuration. Word you could customise many elements utilizing Helm’s
--setflag (defined intimately later).
helm set up my-grafana grafana/grafanaThis command installs Grafana with the title my-grafana. You possibly can change this with a extra descriptive title related to your atmosphere.
- Accessing Grafana: As soon as deployed, you’ll be able to entry Grafana utilizing the service uncovered by the chart. You could find the exterior URL by operating:
kubectl get service my-grafana -o jsonpath='.standing.loadBalancer.ingress[0].ip'or
kubectl port-forward $(kubectl get pods -l app=grafana -n <namespace> -o jsonpath='vary .gadgets[*].metadata.title"n"finish') 3000:3000(Substitute <namespace> with the namespace the place you put in Grafana. The second command is beneficial for native growth and testing).
The default admin password might be discovered within the Kubernetes secrets and techniques:
kubectl get secret -n <namespace> $(helm get values my-grafana --output jsonpath='.title') -o jsonpath='.information.adminPassword' | base64 --decodeIII. Configuring the Grafana Helm Chart
The Grafana Helm chart provides intensive configuration choices by the --set flag. Some essential parameters embody:
-
service.sort: Determines the kind of service (e.g.,LoadBalancer,NodePort,ClusterIP).LoadBalanceris appropriate for cloud environments, whereasNodePortpermits entry from exterior the cluster.ClusterIPis for inner entry solely. -
ingress.enabled: Allows or disables the Ingress useful resource, essential for exterior entry. Requires an Ingress controller to be deployed in your cluster. -
persistence.enabled: Allows persistent storage for Grafana information. Extremely advisable for manufacturing environments to stop information loss. You may have to specify a PersistentVolumeClaim (PVC) or different storage mechanism. -
adminUserandadminPassword: Lets you customise the admin username and password. For safety finest practices, generate robust, distinctive passwords and keep away from utilizing the default values. -
datasources.datasources: Permits configuring information sources instantly throughout set up. It is a highly effective characteristic for robotically connecting Grafana to your monitoring targets. We’ll discover this additional within the subsequent part. -
picture.tag: Specifies the Grafana picture model to deploy. All the time preserve your Grafana occasion up to date with the newest safety patches.
Instance of setting some parameters throughout set up:
helm set up my-grafana grafana/grafana
  --set service.sort=LoadBalancer
  --set persistence.enabled=true
  --set persistence.measurement=10Gi
  --set adminUser=myadmin
  --set adminPassword=MyStrongPassword!
IV. Connecting Information Sources
Grafana’s energy lies in its capacity to visualise information from varied sources. Connecting information sources is crucial for efficient Kubernetes monitoring. The commonest information sources for Kubernetes monitoring embody:
- Prometheus: A broadly used monitoring system for accumulating metrics from Kubernetes elements and functions.
- Loki: A horizontally scalable log aggregation system designed for Kubernetes.
- Elasticsearch: A strong search and analytics engine usually used for log administration and centralized monitoring.
- CloudWatch: Amazon’s monitoring service, excellent for monitoring functions operating on AWS.
Connecting these information sources might be performed both in the course of the Grafana Helm chart set up (utilizing datasources.datasources) or manually after the deployment. The handbook method is mostly most well-liked for flexibility. After logging into Grafana, navigate to the info sources part and add the mandatory connections, configuring the URLs, credentials, and different parameters accordingly.
V. Using Pre-built Dashboards and Plugins
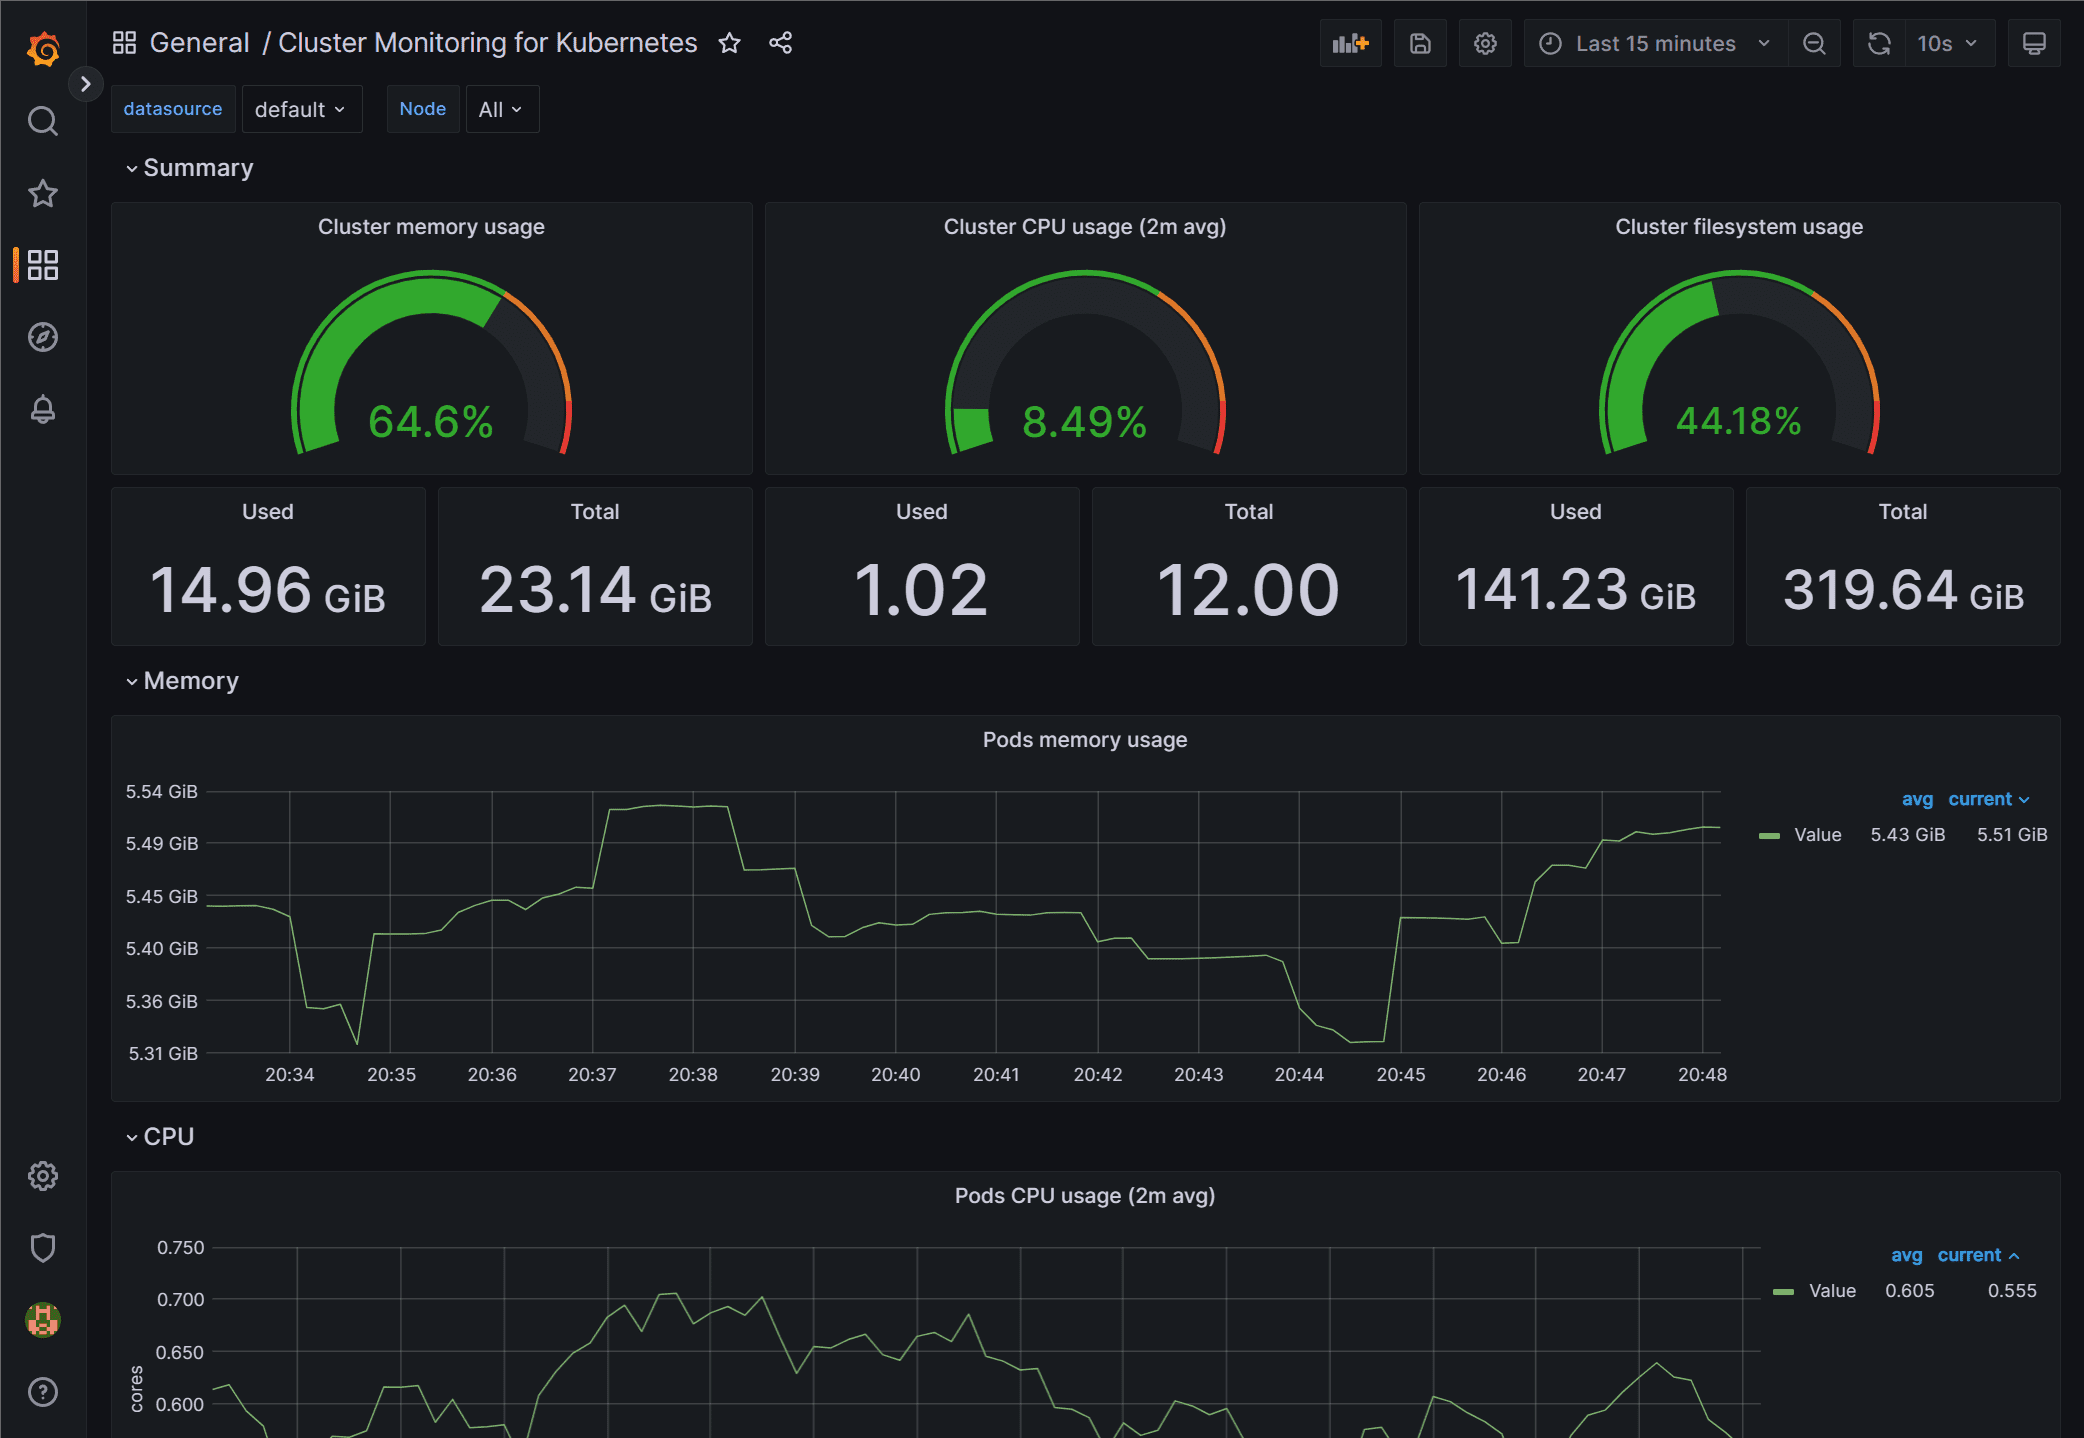
Grafana provides an enormous library of pre-built dashboards and plugins particularly designed for Kubernetes monitoring. These can considerably speed up the setup course of and supply worthwhile insights into your cluster’s well being and efficiency.
Many community-maintained dashboards can be found, usually optimized for particular monitoring instruments like Prometheus and the Kubernetes metrics server. You possibly can import these dashboards instantly into your Grafana occasion, offering instant visualizations of key metrics like CPU utilization, reminiscence utilization, pod standing, and community site visitors.
Plugins prolong Grafana’s performance, including assist for extra information sources, visualizations, and options. A number of plugins are particularly designed for enhancing Kubernetes monitoring capabilities.
VI. Superior Strategies and Finest Practices
- Alerting: Configure Grafana alerts to inform you of crucial occasions and potential points inside your Kubernetes cluster. This proactive method ensures well timed intervention and prevents outages.
- Position-Primarily based Entry Management (RBAC): Implement RBAC to manage entry to Grafana and its dashboards based mostly on consumer roles and tasks. This enhances safety and prevents unauthorized entry to delicate info.
- Scaling: Guarantee your Grafana deployment can scale to deal with the rising quantity of information as your Kubernetes cluster grows. This may increasingly contain adjusting useful resource requests and limits, and doubtlessly utilizing horizontal pod autoscaling.
- Monitoring Grafana Itself: Monitor the Grafana occasion itself to make sure its well being and efficiency. This may be achieved by utilizing Prometheus or different monitoring instruments to trace its useful resource consumption and different related metrics.
- Centralized Logging: Combine Grafana with a centralized logging system like Elasticsearch or Loki to achieve complete visibility into your Kubernetes cluster’s logs.
VII. Conclusion
The Grafana Helm chart provides a streamlined and environment friendly method to deploying and managing Grafana for Kubernetes monitoring. By leveraging its options and integrating it with acceptable information sources and dashboards, you’ll be able to achieve invaluable insights into your cluster’s well being, efficiency, and useful resource utilization. Understanding the configuration choices, leveraging pre-built dashboards, and implementing superior methods are essential for maximizing the worth of Grafana in your Kubernetes atmosphere. Keep in mind to prioritize safety finest practices, implement correct RBAC, and constantly monitor your Grafana occasion to make sure its reliability and effectiveness. By following these tips, you’ll be able to set up a sturdy and scalable Kubernetes monitoring answer that empowers knowledgeable decision-making and proactive problem-solving.


Closure
Thus, we hope this text has supplied worthwhile insights into Mastering Grafana Kubernetes Monitoring with the Helm Chart: A Deep Dive. We thanks for taking the time to learn this text. See you in our subsequent article!